Handling security deposits when renting an apartment is a crucial aspect that involves understanding tenant rights, state laws, and landlord responsibilities, with over 43 million renter households in the United States, it’s essential to understand how security deposits work, as this impacts a large percentage of the population.
It’s not just about handing over money, it’s a financial agreement that requires attention to detail, and if you are renting you need to understand this.
A security deposit is a financial cushion for landlords to cover potential damages beyond normal wear and tear, unpaid rent, or breaches in the lease agreement, but it’s your money, so you need to safeguard it.
State laws dictate the limits and regulations, often capping the deposit at one to two months’ rent and these are not just suggestions, you must know the laws of your state.
The deposit isn’t a prepayment for rent, it’s a safety net, and while the landlord holds it, its purpose is for their protection, not yours, and the average security deposit can range from $1000-$2000, so, it’s an amount of money worth protecting.
Landlords require these deposits to minimize risk and protect their investment.
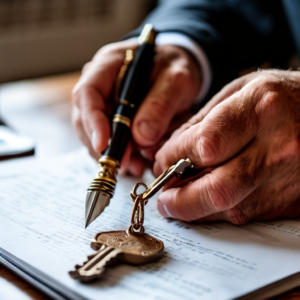
Paying the security deposit correctly involves more than just writing a check.
You must be aware of deadlines, payment methods, and receipts.
Cashier’s checks, money orders, and online payments are often preferred due to their traceability, but you should also be aware that landlords also accept personal checks, always make a copy.
Upon payment, always secure a receipt as it serves as your financial proof of payment.
It must include the date of payment, the amount, and the property address.
When you move in documenting the apartment is a must.
You must have a detailed move-in inspection to protect yourself from being charged for damage that already existed.
It’s your responsibility to document every scratch, stain, or broken item, this creates a reference point that will protect you.
Take photographs and videos, they are not optional they are a requirement, and they serve as visual evidence, it’s not just about taking pictures, it’s about securing your deposit. Always describe details in your notes.
Use descriptive language: “small scratch on the cabinet door.” Don’t say the walls are bad, say “small nail hole in the living room wall”, also keep copies of the checklist, it will be useful later.
Using your security deposit wisely means understanding the difference between normal wear and tear and damage.
Normal wear and tear comes with standard use like faded paint and worn carpets, and landlords can not deduct from your deposit for normal wear.
Damages, however, like broken windows or holes in the walls can be deducted.
Proactive maintenance during your tenancy is really important, and includes cleaning, reporting issues immediately and fixing them.
For example, if you have a leak, fix it immediately and inform your landlord, in order to avoid major damages.
Always communicate with your landlord, they also want to protect the property, so having open communication is a win win.
When you move out, always request a walk-through inspection, it’s your chance to see what the landlord will see, and try to solve any issues before it’s too late.
Clean the apartment thoroughly, leaving it spotless, and provide your new mailing address, or the landlord might not be able to return the deposit to you.
The landlord has a deadline to return the security deposit that is regulated by your state laws and must also provide an itemized list of deductions, if not, you might be entitled to get your full deposit back.
With 32% of renters experiencing issues with getting their security deposit back, having these details clear will prevent future problems.
By documenting everything, you will be in control, and will have a higher chance of getting your full deposit back.
Understanding the Security Deposit
A security deposit, it’s the money you give a landlord before you move into a place.
It’s a safety net, a financial cushion, for them, not you, really.
It’s there to cover any damage you might do to the apartment, damage that goes beyond normal wear and tear, and it can cover rent you don’t pay.
Landlords require it because owning a property is a business, and they need to protect their investment.
It’s not a handshake agreement, it’s a financial agreement. You must know what it entails.
The amount for the security deposit isn’t a free-for-all either.
State laws often regulate how much a landlord can demand. They might limit it to one or two months’ rent. Some states have extra protections for tenants.
It’s not the wild west, you must check the specific laws for your location, it will protect you from any landlord who wants to take advantage.
These rules matter, they dictate what the landlord can and can’t do with your money. Think of them as the rules of the game.
What Exactly is a Security Deposit?
A security deposit is a sum of money you, the tenant, provide to your landlord.
It’s held by the landlord to cover potential damages to the property, unpaid rent, or any other breaches of the lease agreement. It is a security net for them not you.
It’s not just a down payment for the keys, it’s an assurance that if something goes wrong, the landlord isn’t left holding the bag.
It’s a financial safety measure, but it’s your money, so you need to treat it like such.
- Purpose: To protect landlords from financial loss due to tenant actions or neglect.
- Not Rent: It’s not a prepayment for rent, though it can be used to cover unpaid rent.
- Refundable Mostly: If you leave the apartment in good condition, you should get the deposit back, minus any legitimate deductions.
- Legal Obligation: The terms around security deposits are often legally defined, varying by location.
- Financial Protection: Provides a financial cushion for the landlord, not you.
Here is a simple table to help visualize it:
| Feature | Description |
|---|---|
| Definition | Money held by the landlord to cover potential damages or unpaid rent. |
| Purpose | To protect the landlord’s investment in the property. |
| Refundable | Yes, if the property is left in good condition and all lease terms are met. |
| Legal Basis | Regulated by state and local laws; limitations and rules vary by jurisdiction. |
| Not Rent | Not a prepayment of rent, although it can be used to cover unpaid rent upon lease termination. |
| Financial | Landlord has it in case something happens, it’s not just there to sit, it has purpose for them not you. |
Why Landlords Require a Security Deposit?
Landlords require security deposits to safeguard their property and financial interests.
They see it as a business transaction, and deposits are a crucial part of that. It is not personal, it is just business.
It’s protection against the unexpected, and it gives them a sense of security to rent the place out.
Landlords are looking for ways to minimize risks, and the security deposit is their first line of defense.
- Damage Protection: Covers repair costs beyond normal wear and tear, like holes in the wall, broken appliances, or stained carpets.
- Unpaid Rent: Protects against tenants who don’t pay their rent, or move out without paying the amount due.
- Lease Breaches: Provides funds to cover costs if a tenant breaks their lease early.
- Cleaning Costs: Used for deep cleaning if the apartment is left in an unacceptably dirty condition.
- Peace of Mind: Gives landlords a sense of security knowing they have a financial buffer.
Here’s a practical list of scenarios where a security deposit might be used by the landlord:
- Holes in the Walls: If you hang a lot of pictures and cause damage.
- Broken Appliances: If something breaks due to misuse.
- Stained Carpets: If you spill something and stain the carpet.
- Unpaid Rent: If you owe rent money at the end of your tenancy.
- Damaged Doors: If there is any damage to the doors.
- Deep Cleaning: If you leave the place dirty and need a special cleaning.
- Unauthorized Modifications: If you paint the walls a different color without approval.
- Broken Windows: If a window was broken and it is your fault.
State Laws and Security Deposit Limits
State laws about security deposits can vary greatly, and these laws are important.
They dictate the maximum amount a landlord can charge, how they must hold the deposit, and the time frame they have to return it to you after you move out.
You need to know these rules before handing over any money, it will save you a lot of headaches.
It is not a suggestion it is a requirement to know the rules.
- Maximum Deposit Amount: Many states limit how much a landlord can charge, often one or two months’ rent.
- Holding the Deposit: Some states require landlords to keep security deposits in a separate bank account.
- Interest on Deposits: Some locations mandate that landlords pay tenants interest on the security deposit.
- Return Deadlines: States set specific time frames e.g., 14 to 60 days within which landlords must return the deposit or provide an itemized list of deductions.
- Itemized Deductions: Landlords must provide a detailed list of all deductions from the deposit, if they do not, you might be entitled to receive the entire deposit.
- Legal Recourse: State laws often outline tenants’ rights if a landlord fails to return the deposit properly.
Here is a table to compare how laws vary across different states:
| State | Maximum Deposit | Interest Required? | Return Deadline | Itemized Deductions Required? |
|---|---|---|---|---|
| California | 2x Rent Unfurnished / 3x Furnished | No | 21 days | Yes |
| New York | 1x Rent | Yes | 14 days | Yes |
| Texas | No Limit | No | 30 days | Yes |
| Florida | No Limit | No | 15-30 days | Yes |
| Massachusetts | 1x Rent | Yes | 30 days | Yes |
| Illinois | 1.5x Rent | No | 30-45 days | Yes |
Always consult your local and state regulations for the most accurate information.
Paying the Security Deposit

Paying the security deposit might seem straightforward, but there’s more to it than just handing over the cash.
Knowing the when, how, and what documentation to expect can save you a lot of trouble down the line.
It’s not just about writing a check, it’s about protecting yourself.
The payment is a transaction that needs to be clean and clear.
You need to be aware of the deadlines, accepted methods of payments, and the receipts, if not, you can encounter problems in the future with your landlord.
It’s not just about giving them money, it’s about securing your rights.
These are the first steps in a financial relationship you need to understand well.
When is the Security Deposit Due?
The security deposit is usually due when you sign the lease agreement.
Landlords want the money secured before they hand over the keys. It’s a crucial step in the rental process.
Think of it like buying a car, you don’t drive it off the lot before they have the payment.
You should have all the terms of when it needs to be paid, usually upfront.
- Lease Signing: Typically, the deposit is due upon signing the lease agreement.
- Before Move-In: The payment needs to be made prior to receiving the keys or moving into the property.
- Negotiation: In some cases, the deposit due date can be negotiated, but it’s usually a standard requirement.
- Payment Timeline: Be clear on the timeline, late deposits can cause problems.
- First Month’s Rent: Often, the first month’s rent is due at the same time as the deposit.
- Confirm Payment Method: Ensure you know how they want the payment.
Here’s a breakdown of a typical timeline:
- Application Approval: After you apply and the landlord accepts you.
- Lease Agreement: Upon signing the lease, the deposit and first month’s rent become due.
- Key Handover: You receive the keys only after paying the security deposit.

Acceptable Methods of Payment
Landlords often accept a variety of payment methods for security deposits, but it’s important to know which ones are acceptable.
Using a traceable method is good for your record keeping and also for the landlord, this avoids any confusion.
Knowing the accepted methods can save you some headaches, it’s about efficiency and clarity.
- Cashier’s Check: Considered a secure form of payment with the bank as the guarantor.
- Money Order: Another secure option, providing a paper trail of payment.
- Personal Check: Can be used, but the landlord might wait for the check to clear before handing over the keys, also keep a copy of it.
- Online Payment: Some landlords use online payment portals, which are convenient and traceable.
- Certified Check: Similar to a cashier’s check and is guaranteed by the bank.
- Electronic Transfers: Some landlords accept direct bank transfers via apps or online.
- Credit or Debit Card: Less common, but some landlords may accept payments through credit or debit card processors.
Here is a table summarizing the various payment methods:
| Payment Method | Security | Traceability | Processing Time | Pros | Cons |
|---|---|---|---|---|---|
| Cashier’s Check | High | High | Immediate | Guaranteed by the bank | Requires a bank visit |
| Money Order | High | High | Immediate | Safe, readily available | Requires going to a store to obtain it. |
| Personal Check | Medium | High | Can take days | Easy to obtain. | May delay move-in due to clearance time |
| Online Payment | High | High | Immediate | Convenient, easy to track | May incur processing fees, needs internet connection |
| Certified Check | High | High | Immediate | Guaranteed by the bank | Requires a bank visit |
| Electronic Transfers | High | High | Immediate | Fast, easy to use, direct bank transfers | Requires bank verification, internet connection |
| Credit/Debit Card | Medium | High | Immediate | Convenient to use, can pay with card | May incur processing fees, less common for landlords |
Getting a Receipt for Your Deposit
After you pay the security deposit, get a receipt.
It’s the proof you have, in case anything goes wrong.
It’s not just a piece of paper, it’s your protection.
A receipt documents that you’ve paid, and it can be important if the landlord tries to claim you haven’t.
This is your financial proof, you must keep it in a safe place.
- Official Receipt: Get a written receipt from your landlord or property manager.
- Details Included: The receipt should include the amount of the deposit, date of payment, the property address, and landlord’s name.
- Keep it Safe: Store the receipt with your important rental documents, do not lose it.
- Copy for You: Make a copy of the receipt for yourself, and store them separately.
- Electronic Confirmation: If paying electronically, save the confirmation email or screenshot.
- Payment method: Make sure to have the method of payment also in the receipt.
Here is a checklist of what to confirm in the receipt:
- Date of Payment: Verify that the date on the receipt matches the payment date.
- Payment Amount: Check the amount and match it to what you gave.
- Property Address: Make sure to have the address of the rental unit.
- Landlord’s Information: Confirm the name and contact details of the landlord.
- Form of Payment: Verify the method used, such as cashier’s check, personal check or electronic payment.
- Signature: If possible, get a signature from the landlord or their representative.
Paying it with a Personal Check
Paying with a personal check is a common practice.
It’s convenient for both parties, but you should be aware of the implications.
The landlord can wait for it to clear before giving the keys, it can also be proof for you of the transaction.
Personal checks are acceptable, but they come with some risks you need to know.
- Check Clearing: Landlords might wait for the check to clear before considering the deposit paid.
- Tracking: Personal checks provide a record of the payment through your bank statements, always save copies of the check.
- Security: Ensure you fill out the check correctly to avoid any complications.
- Proof of Payment: The cleared check acts as proof of payment, if anything happens it’s your main proof of payment.
- Potential Delays: Be aware that the clearance period might delay your move-in.
- Avoid Bouncing: Make sure the funds are available in your account to avoid any charges or issues.
Here’s a list of the steps you should follow when using a personal check for the security deposit:
- Fill it Correctly: Write all the information in the check, the date, the name of the landlord, and the correct amount.
- Write a Memo: Include “Security Deposit” and the property address in the memo line.
- Keep a Copy: Keep a photocopy of the check before giving it to your landlord.
- Check Your Bank Statements: Confirm that your check has cleared to ensure payment went through.
- Reconcile: Cross-reference the cleared check with your bank statements.
- Get Receipt: Always get a written receipt for your records.
Documenting the Apartment Condition
Documenting the apartment’s condition when you move in is critical.
This step protects your security deposit, it’s like getting a map before you go on a trip, you need to have it before you start.
It is your proof of what the apartment looked like before you moved in, if you don’t have it, you can be in trouble.
You can avoid problems by having this documentation to protect yourself from any landlord trying to keep the deposit for existing problems.
The move-in inspection is your chance to note every scratch, stain, or broken item and have a documented proof.
This process isn’t just about finding flaws, it’s about making sure you’re not held responsible for pre-existing damage.
It’s a crucial part of the security deposit equation.
The Importance of a Move-In Inspection
A move-in inspection is essential for protecting your security deposit.
It creates a record of the property’s condition before you move in, preventing you from being blamed for pre-existing issues.
It’s not a formality, it’s a critical process to document any flaws.
Without a detailed inspection, you’re vulnerable, and you need to know this.
- Protects Your Deposit: Avoids being charged for damages you didn’t cause.
- Establishes a Baseline: Creates a starting point for the property’s condition.
- Fairness: Ensures a fair evaluation of damages when you move out.
- Transparency: Promotes a clear understanding of the apartment’s condition.
- Prevents Disputes: Reduces the likelihood of disagreements with the landlord about damages.
- Documentation: Creates a documented proof of the initial state of the unit.
Here’s a list of why a move-in inspection is necessary:
- Avoids Unjust Charges: Prevents landlords from charging for pre-existing conditions.
- Provides Peace of Mind: Knowing you have documented the conditions.
- Establishes a Reference Point: Allows for an accurate comparison at move-out.
- Facilitates Communication: Enables you to address issues with your landlord promptly.
- Legal Protection: Provides evidence if legal disputes arise.
- Sets Expectations: Provides a clear understanding of what is considered damage.
Using a Checklist During the Inspection
Using a checklist during your move-in inspection helps you be thorough.
It will guarantee that you don’t miss anything important.
This checklist is not just a guideline, it’s your tool for a detailed assessment. It is your protection, so, use it wisely.
- Comprehensive Coverage: Ensures every area is checked, from walls to appliances.
- Systematic Approach: Helps you stay organized and not overlook anything.
- Reference Document: Serves as a reliable reference when you move out.
- Easy Documentation: Makes it easy to document the condition of each item.
- Time-Efficient: Streamlines the inspection process by ensuring nothing is forgotten.
- Clarity: Provides a written record that everyone can reference.
Here is a sample of what a move-in checklist can include:
| Area | Item | Condition |
|---|---|---|
| Living Room | Walls | e.g., clean, holes, paint chips |
| Floors | e.g., clean, scratches, stains | |
| Windows | e.g., intact, cracks, clean | |
| Kitchen | Cabinets | e.g., intact, scratches, clean |
| Countertops | e.g., clean, stains, scratches | |
| Appliances | e.g., working, clean, dents | |
| Bathroom | Toilet | e.g., working, clean, stains |
| Sink | e.g., working, clean, stains | |
| Shower/Tub | e.g., clean, cracks, mold | |
| Bedrooms | Doors | e.g., working, scratches, dents |
| Closets | e.g., working, shelves, clean | |
| General | Lighting Fixtures | e.g., working, clean, intact |
| Smoke Detectors | e.g., working, batteries |
Taking Photos and Videos
Photographs and videos can provide undeniable evidence of the apartment’s condition at move-in.
This additional step gives you a safety net for any disagreements in the future. It is not an option, it is a requirement. Visual evidence leaves no room for doubt.
Pictures and videos don’t lie, they are your best defense.
- Detailed Record: Photos and videos capture specific details that written notes may miss.
- Visual Proof: Provides evidence of any pre-existing damages or issues.
- Time Stamp: Many digital cameras and phones include a date and time stamp on photos and videos.
- Multiple Angles: Take multiple photos from different angles.
- Full Coverage: Capture every room and all the details.
- Additional Proof: Always save these photos and videos in an external drive.
Here is a step-by-step guide on how to take effective photos and videos:
- Start with a Walk-Through: Film a complete video walk-through of the apartment, showing each room and area.
- Focus on Details: Take close-up photos of any existing damage, stains, cracks, or imperfections.
- Capture Different Angles: Take photos of each item from multiple angles to provide a thorough view.
- Take Photos of the walls: It is really important to get detailed photos of the walls.
- Include a Reference: Place a coin or a ruler next to the damage for size reference.
- Keep It Organized: Organize all the photos and videos by room and date.
Adding Specific Notes about Pre-existing Damage
Adding specific notes about pre-existing damage is key to your documentation. Details matter.
It’s not enough to just say a wall is scratched, you need to describe the scratch. You need to specify the details.
These notes will be your best friend when you move out and are having issues with the landlord.
- Detailed Descriptions: Note the size, location, and type of damage, be very precise.
- Specific Areas: Focus on areas like walls, floors, and appliances.
- Accuracy: Be precise when documenting the damages.
- Clarity: Use clear and concise language in your notes.
- Checklist cross-reference: Cross-reference notes with the move-in checklist.
- Use descriptive language: For example, “small scratch on the cabinet door”, or “stain on the carpet in the corner of the bedroom”.
Here’s a list of common damages to note, with examples of specific descriptions:
- Walls: “Small nail hole in the living room wall, about an inch above the baseboard, filled with spackle but not sanded down.”
- Floors: “A dark stain on the hardwood floor in the hallway, about three inches in diameter, near the bathroom entrance.”
- Appliances: “Refrigerator door has a dent on the right side, about five inches in diameter, near the top.”
- Furniture: “Slight scratch on the sofa cushion, on the left side near the armrest.”
- Windows: “Crack on the window in the bedroom, about 4 inches long on the bottom left side”.
- Bathroom: “Stain on the bathroom sink, to the left side”.
Keeping a Copy of the Inspection Checklist
Always keep a copy of the completed inspection checklist, it is not optional.
This is not the landlord’s checklist, it is your copy of the checklist.
Keep it in a secure place, and if possible, keep another one in a different place.
You must protect yourself, especially from bad landlords. It’s your defense against unjust claims.
- Personal Record: Ensures you have a record of the property’s condition.
- Accessibility: Keep it in an easy-to-find place.
- Protection: Provides proof if disputes arise about damages.
- Reference Point: Use it as a reference when you move out to compare the initial conditions.
- Digital Copy: Scan a copy for easy access and backup.
- Multiple Copies: Keep multiple copies in different locations.
Here’s why keeping a copy is crucial:
- Prevent Fraud: Landlords can claim damages that were pre-existing.
- Quick Reference: It is easy to reference the document during your tenancy if needed.
- Legal Protection: If you have any problems with the landlord, you have a clear documentation.
- Future Proof: If you need a copy of your move in checklist a year later, you have it and it will be very useful.
- Peace of Mind: Knowing you are protected and documented.
Using Your Security Deposit Wisely

Using your security deposit wisely means understanding what it covers and how you can avoid deductions, and it means taking care of the property.
It’s not just about moving in and hoping for the best. It’s about actively protecting your investment. You need to be proactive, not just reactive. Being careful can save you money.
It is about knowing the difference between normal wear and tear versus damage, proactively maintaining the apartment, and reporting issues immediately, these things can keep you in control.
Understanding these aspects helps you maximize your chances of getting your full security deposit back.
Understanding Normal Wear and Tear
Normal wear and tear refers to the natural deterioration of a property that occurs over time with normal use, it is not the same as damage. It is expected.
It’s the small marks and scuffs that happen when someone lives in a place, it should not be on you.
Landlords cannot deduct from your security deposit for normal wear and tear, it’s their responsibility to maintain their property with the normal use.
- Everyday Use: This includes things like faded paint, worn carpets, or loose door handles.
- Not Deductible: Landlords cannot charge you for normal wear and tear.
- Expected Changes: It’s the kind of wear that’s expected when someone occupies a property for a while.
- Age-Related: Includes things like aged paint or worn bathroom fixtures.
- Reasonable Use: Things that happen while using things reasonably.
- Landlord’s Responsibility: It’s the landlord’s responsibility to maintain the property with this wear.
Here is a table to differentiate normal wear and tear from damage:
| Aspect | Normal Wear and Tear | Damage |
|---|---|---|
| Definition | Gradual deterioration over time from normal use. | Harm caused by neglect or abuse. |
| Cause | Occurs naturally through daily living. | Results from an action that is not part of normal use. |
| Examples | Faded paint, slightly worn carpets, loose door handles, minor scuffs on walls. | Broken window, large holes in the walls, stains on the carpet, ripped curtains, broken appliances |
| Landlord’s Responsibility | Landlord cannot deduct from security deposit for this. | Landlord can deduct from security deposit to repair this. |
| Maintenance | Landlords must repair to maintain their property. | The tenant is responsible for causing this damage. |
Damages That Could be Deducted
Damages that could be deducted from your security deposit are those beyond normal wear and tear, these are the damages you cause to the property due to neglect or abuse.
The landlord has the right to deduct from your deposit to cover the cost of repairs.
You are responsible for taking care of the property and avoid causing such damage.
- Intentional Acts: Damage resulting from deliberate actions, like broken windows, holes in the walls, or stains on the carpet.
- Neglect: Failure to maintain the property properly, like overflowing a bathtub or leaving trash that causes damage.
- Abuse: Damage caused by misuse of property like misuse of appliances.
- Significant Damage: Not a small scratch, but something that costs more to repair.
- Beyond Regular Use: Damages that happen as a result of abuse or negligence, not regular use.
- Costly Repairs: Damages that require more than minor repairs to restore the property to its original state.
Here are common damages that are usually deductible:
- Holes in the Walls: Large holes, or damage from hanging items without care, are deductible.
- Broken Windows: Broken windows resulting from your actions or negligence are your responsibility.
- Stained or Ripped Carpets: Stains or tears on the carpets from spills or mistreatment can be deducted from your deposit.
- Broken Appliances: If an appliance breaks due to misuse, you might be charged for its repair or replacement.
- Damaged Doors: Doors that are damaged beyond normal wear and tear can result in deductions.
- Pet Damage: Damages caused by your pets, like scratches on doors, carpets or chewed furniture, can be deducted.
Proactive Maintenance and Repairs During Tenancy
Proactive maintenance and repairs during your tenancy can save you money, it means taking care of the property as if it were your own.
Addressing small issues before they become big problems is a good strategy for not losing the security deposit. This effort will show your responsibility.
- Regular Cleaning: Keeping the apartment clean prevents dirt build-up and potential damages.
- Report Issues Promptly: Alert your landlord to any maintenance problems as soon as they occur.
- Minor Repairs: Fix small issues yourself, like tightening a screw or touch-up paint in order to avoid bigger problems.
- Preventative Measures: Take steps to prevent damage, like using coasters, rugs, or furniture pads.
- Care: Taking good care of the property will avoid deductions and also make it more comfortable.
- Communication: Always communicate with your landlord if you have any questions or issues.
Here is a list of actions for proactive maintenance:
- Fix leaks: If you have any leaks, fix them as soon as possible to avoid mold or water damage.
- Use Coasters and Placemats: Protect surfaces with coasters and placemats.
- Wipe Spills: Clean up spills immediately to avoid stains.
- Clean Regularly: Clean your apartment regularly to avoid damage and issues.
- Check for Pests: Check the apartment regularly for pests or mold and report to your landlord promptly.
- Change Air Filters: Change air filters if you have a central heating and cooling system.
Notifying Landlord of Issues Immediately
Notifying your landlord of issues immediately is crucial, you should do it as soon as you notice something.
It’s not their job to come every day to check the apartment, your role is to communicate any problems you see.
This is your responsibility, and not reporting can lead to more severe damages later.
Early reporting can prevent small issues from becoming big problems.
- Timely Reporting: Reporting damages quickly allows for prompt repairs, avoiding more damage.
- Landlord Responsibility: Some repairs are the landlord’s responsibility, make sure to inform them immediately.
- Written Notification: Send a written notice email or letter for your records.
- Avoid Further Damage: Early reporting helps prevent the damage from escalating.
- Proof of Notification: Having written notification ensures you’re not blamed for damages you reported.
- Good Communication: Keeps the landlord informed and up to date about any issues on their property.
Here’s a step-by-step guide to follow when notifying your landlord:
- Assess the Issue: Identify and evaluate the problem.
- Take Photos: Take pictures to include in your notification.
- Write a Detailed Message: Describe the problem in detail and send it through email or certified mail.
- Keep Records: Keep copies of all communication, including photos or videos.
- Follow up: Follow up with your landlord to ensure repairs are made.
- Get confirmation: Get a written confirmation from the landlord that he has received the communication.
Getting Your Security Deposit Back
Getting your security deposit back is the goal when you move out. However, it’s not automatic.
It requires you to know your rights and responsibilities and the steps you need to take to ensure you get the refund you deserve.
Understanding this process is important for a successful move-out. This is the time your work really pays off.
It means doing your part, such as cleaning the apartment well and providing your new address.
It also means understanding the landlord’s obligations and the deadlines for returning your deposit.
It is also about knowing how to handle itemized deductions, and what to do if you believe they’re unfair.
This knowledge will give you power when the time to move out comes.
Landlord’s Obligations at Move-Out
Landlords have specific obligations when you move out, and these obligations are there to protect the tenant, you need to know your rights.
They can’t keep your security deposit without a valid reason.
You must understand these obligations as it protects your deposit.
You must know what the landlord needs to do when you move out.
- Inspection: They have the right to inspect the property when you move out.
- Return Deadline: They must return the deposit within a certain timeframe, which is set by your state.
- Itemized List: They must provide an itemized list of deductions, if there are any.
- Legitimate Deductions: They can deduct for damages beyond normal wear and tear.
- Compliance with Laws: They must adhere to state and local laws regarding security deposits.
- Provide reasons: Landlords must provide written reasons for any deductions.
Here is a list of what a landlord must do when you move out:
- Conduct a Walk-Through: The landlord will perform a final inspection of the property to assess any damages.
- Provide Itemized List: If there are damages beyond normal wear and tear, the landlord must provide a written itemized list of all deductions from the security deposit.
- Return the Remaining Balance: The landlord must return the remaining balance of the security deposit if there are any remaining funds, it must be sent within the required time.
- Adhere to Deadlines: The landlord must adhere to the state laws regarding the deadline for return of the deposit.
- Act Fairly: Landlords must act in accordance with fair housing laws, and must not discriminate or act in bad faith when assessing damages.
Requesting a Walk-Through Inspection Before Moving Out
Requesting a walk-through inspection before you move out can prevent disputes later.
It’s your chance to see what the landlord will see, and to address any potential issues before it’s too late. This step gives you control and avoids surprises.
You can fix many problems or issues during that inspection.
- Identify Issues: A walk-through allows you to identify potential issues the landlord may deduct for.
- Discuss Concerns: You can discuss any concerns with the landlord and work towards a solution before moving out.
- Opportunity to Repair: It provides you an opportunity to address problems before the final inspection.
- Avoid Surprises: It eliminates the possibility of being surprised by unexpected deductions.
- Negotiate: You can try to negotiate any possible deductions.
- Peace of Mind: It gives you peace of mind knowing what to expect.
Here is a step-by-step guide for a walk-through inspection:
- Schedule a walk-through: Contact the landlord to schedule a walk-through inspection a week or two before your move-out date.
- Use your original checklist: Use your original move-in checklist as a reference during the walk-through.
- Take photos: Take photos of the apartment condition, and any repairs you made.
- Discuss Issues: Talk to your landlord about any issues or damages you have fixed or are still pending.
- Ask for a list of issues: Request a written list of any concerns or damages they have.
- Keep Record: Keep records of the walk-through, with date and time, and any notes.
Clean the Apartment Thoroughly
Cleaning the apartment thoroughly before you move out is non-negotiable.
It’s not enough to just pack your belongings and leave, you need to leave the place spotless.
Your goal is to leave the apartment in the same condition as when you moved in.
A clean apartment will greatly improve your chances of getting your full security deposit back.
- Basic Cleaning: Clean all surfaces, floors, and bathrooms thoroughly, and make it shine.
- Appliances: Clean all appliances inside and out, if not, it can be a reason for a deduction.
- Windows and Mirrors: Make sure windows and mirrors are clean and clear.
- Walls: Clean any marks or scuffs on the walls with a damp cloth.
- Vacuum/Mop: Vacuum or mop all floors and make them spotless.
- Details: Focus on the details: behind the toilet, inside the refrigerator, inside the microwave, etc.
Here is a cleaning checklist you should follow:
- All Rooms: Dust and wipe down all surfaces, including shelves, window sills, baseboards, and furniture.
- Floors: Vacuum or mop all floors; pay special attention to corners and edges.
- Kitchen: Clean the oven, stove, refrigerator, microwave, and dishwasher; also wipe down the countertops, sink, and cabinets.
- Bathrooms: Scrub the toilet, sink, shower/tub, and floors, also clean mirrors and windows.
- Windows and Mirrors: Clean all windows and mirrors with a streak-free cleaner.
- Walls: Check and clean any marks on the walls, use a magic eraser if necessary.
Providing Your New Mailing Address
Providing your new mailing address to your landlord is essential.
If they do not have the new address, they won’t know where to send your deposit back to. The landlord must have your updated address. This
Conclusion
In the end, the security deposit isn’t some abstract concept, it’s your money, held in trust.
It’s a financial agreement, a game with rules, and you’ve got to play it smart.
By knowing the laws, documenting everything, and taking care of the apartment, you put yourself in the best position to get your money back.
Remember, knowledge is your best tool and preparation is key.
The goal is not just to move out, but to move out smartly.
Understanding the ins and outs of your security deposit is crucial, this process isn’t complicated if you’re careful and diligent from the start.
It is about your money, so you need to act like it and be responsible.
This means documenting the apartment’s condition before you move in, paying attention to how you treat the place while you’re living there, and understanding the landlord’s obligations when you leave.
If you treat it like a business transaction with rules you need to follow, you will get your money back.
Taking the necessary steps to protect your security deposit isn’t just about getting money back, it is also about your responsibilities as a tenant. It’s about being a good renter. It’s about knowing the game and playing it well.
It’s also about being respectful of your landlord’s property and your own financial well being.
It will save you money, time and headaches if you do it right.
In 2023, over 25% of renter disputes involved security deposits, a percentage that could likely be reduced with better understanding and action from tenants like you, according to a study from the National Association of Renters.
So, before you sign that lease, before you hand over your hard-earned cash, remember these points, know your rights, and protect your money.
Be thorough in your move-in inspection, take photos and notes, maintain the apartment, and communicate with your landlord.
With a solid strategy and awareness, you can navigate the security deposit process and walk away with your money in your pocket.
And that’s the bottom line, your money should go back to you, not to your landlord.
Frequently Asked Questions
What is a security deposit?
It’s the money you give the landlord before moving in.
It’s there to cover any damage you might do, beyond normal wear and tear, or any unpaid rent. It’s their safety net, not yours.
How much can a landlord ask for a security deposit?
State laws usually limit the amount. Often, it’s one or two months’ rent. Check your local laws, they’re your protection.
Why do landlords need a security deposit?
Landlords need it to protect their property and their business. It covers damages, unpaid rent, and lease breaches. It’s a business transaction, nothing personal.
Is the security deposit just for damages?
No, it can be used for unpaid rent, and other lease violations.
But you should get it back if you leave the place in good condition and paid all your dues.
What is considered normal wear and tear?
It’s the natural deterioration of the property over time, from normal use. Faded paint, worn carpets, and loose door handles. Landlords can’t charge you for this.
What damages can be deducted from my deposit?
Damages beyond normal wear and tear, like holes in walls, broken appliances, or stained carpets. It’s your fault, you pay.
When do I pay the security deposit?
Usually, it’s when you sign the lease agreement.
Before they hand over the keys, they want their money secured.
What payment methods are accepted?
Cashier’s checks and money orders are secure. Personal checks work but might delay things. Online payments are good if offered. Always get a receipt.
Should I get a receipt for the security deposit?
Yes, always. It’s your proof of payment.
The receipt should include the amount, the date, and the property address. Keep it safe.
Why do I need a move-in inspection?
To document the apartment’s condition before you move in.
It protects you from being blamed for existing damage, if you don’t document anything, it’s your problem.
What should I include in the move-in inspection?
Use a checklist, take photos, and videos. Note every scratch, stain, or broken item. Be very detailed.
Should I keep a copy of the inspection checklist?
Yes, absolutely. It’s your record and your protection. Save it in a secure place.
What should I do if I see a problem during my tenancy?
Tell your landlord right away. It’s your job to inform them.
Send a written note or email, and keep a copy for your records.
What should I do when moving out?
Clean the apartment thoroughly. Leave it as you found it. Also request a walk-through.
What are my landlord’s obligations when I move out?
They must inspect the property, return the deposit within a specific time, and provide an itemized list of any deductions, they must follow the rules.
Should I request a walk-through before moving out?
Yes, it’s your chance to address any issues and avoid surprises later. Discuss any concerns.
How long does a landlord have to return my security deposit?
State laws vary. Often, it’s between 14 to 60 days. Know your local rules.
What if my landlord doesn’t return the security deposit?
If the landlord doesn’t follow the law, or provides unfair deductions, you might need to take legal action. Know your rights.
How do I ensure I get my security deposit back?
Take care of the apartment, clean thoroughly when you leave, do a walk-through, notify of any issues on time, and know your rights.